Rooting your Samsung phone gives you full control over the operating system. This means you can install custom ROMs, kernels, and mods, and you can also remove bloatware and unwanted apps. However, rooting your Samsung phone also comes with some risks, such as voiding your warranty.
To root your Samsung phone, you will need two tools: Magisk and Odin. Magisk is a rooting tool that allows you to patch the firmware AP file of your phone, which is what gives you root access. Odin is a flashing tool that allows you to flash the patched firmware to your phone. Let’s proceed with a step-by-step guide on how to root a Samsung phone using Odin and the necessary tools.

Table of Contents
Root Samsung Phone Via Magisk and Odin
Rooting Samsung phone with Magisk and ODIN process is a bit more complicated than rooting with custom recovery, but it is still possible with careful attention to the steps.
Step 1: Enabling Developer Options
To enable Developer Options on your Samsung Phone, follow these steps:
- Go to Settings on your Samsung Phone.
- Scroll down and tap on About phone.
- Tap on Software information.
- Tap on Build number 7 times.
- Enter your phone’s lock screen PIN or password.
- You will now see the “Developer mode has been enabled!” toast message on the phone screen.
Once Developer options is enabled, you can find it by scrolling down to the bottom of the Settings menu.
Step 2: Enabling the OEM Unlocking Option
To enable the OEM unlocking option on your Samsung Phone, follow these steps:
- Go to Settings > Developer options.
- Toggle ON the OEM unlocking option.
 using Magisk 7")
Once the OEM unlocking option is enabled, you can unlock the bootloader of your phone.
Step 3: Unlocking the Bootloader
After enabling OEM unlocking, follow these steps to unlock the bootloader on your Samsung Phone:
- Power off your phone.
- Press and hold the Volume Up and Volume Down buttons.
- Connect your phone to your PC using the data cable.
- Once you see the bootloader warning screen, press and hold the Volume Up button to unlock the bootloader on your device.
Note: The bootloader warning screen may say something like “Warning: Bootloader Unlocking will erase all data on your phone. Are you sure you want to continue?” You must press the Volume Up button to confirm that you want to unlock the bootloader.
Step 4: Downloading Stock Firmware
Before we proceed with rooting your Samsung Phone, it’s important to have the correct stock firmware for your device.
To download the stock firmware for your Samsung Phone using the Frija tool, you will need to first click on the download button below to obtain the Frija tool.
Once you have downloaded the Frija tool, simply enter your phone model and CSC code into the tool, select the “Auto” option, click on “Check for updates,” and then click the “Download” button to retrieve the firmware.
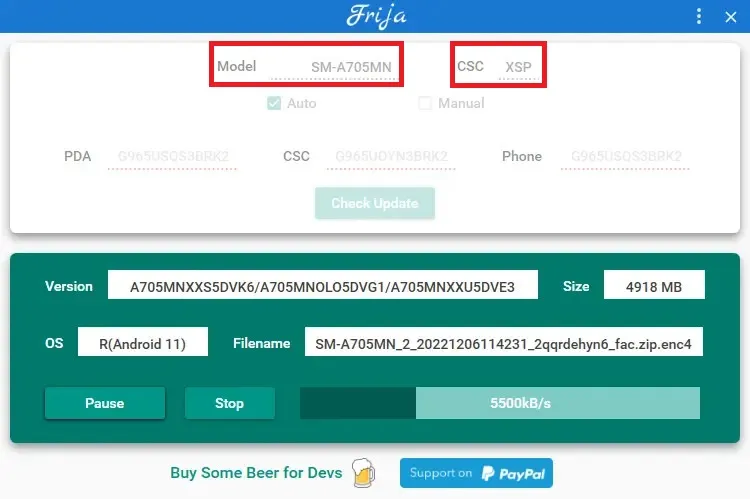
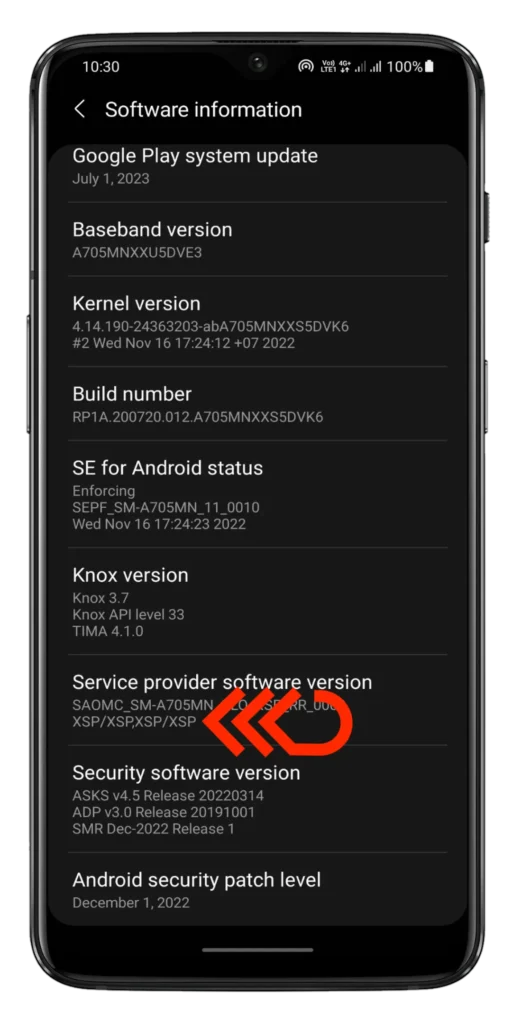
You can find your phone’s model number by going to Settings > About phone. The CSC code can be found in the About phone section, under Software information.
Step 5: Extracting and Patching the Firmware with Magisk
Once you have downloaded the stock firmware for your Samsung Phone, you need to extract it and patch the AP firmware with Magisk.
To extract the firmware:
- Open the firmware file using a zip extractor tool.
- You will see a folder with the firmware files.
- The AP firmware file is the file that you need to patch with Magisk.
To patch the AP firmware with Magisk:
To patch the AP firmware with Magisk, begin by downloading the Magisk app. Once the download is complete, proceed to install the app on your device. After installation, follow the provided guide for the patching process.
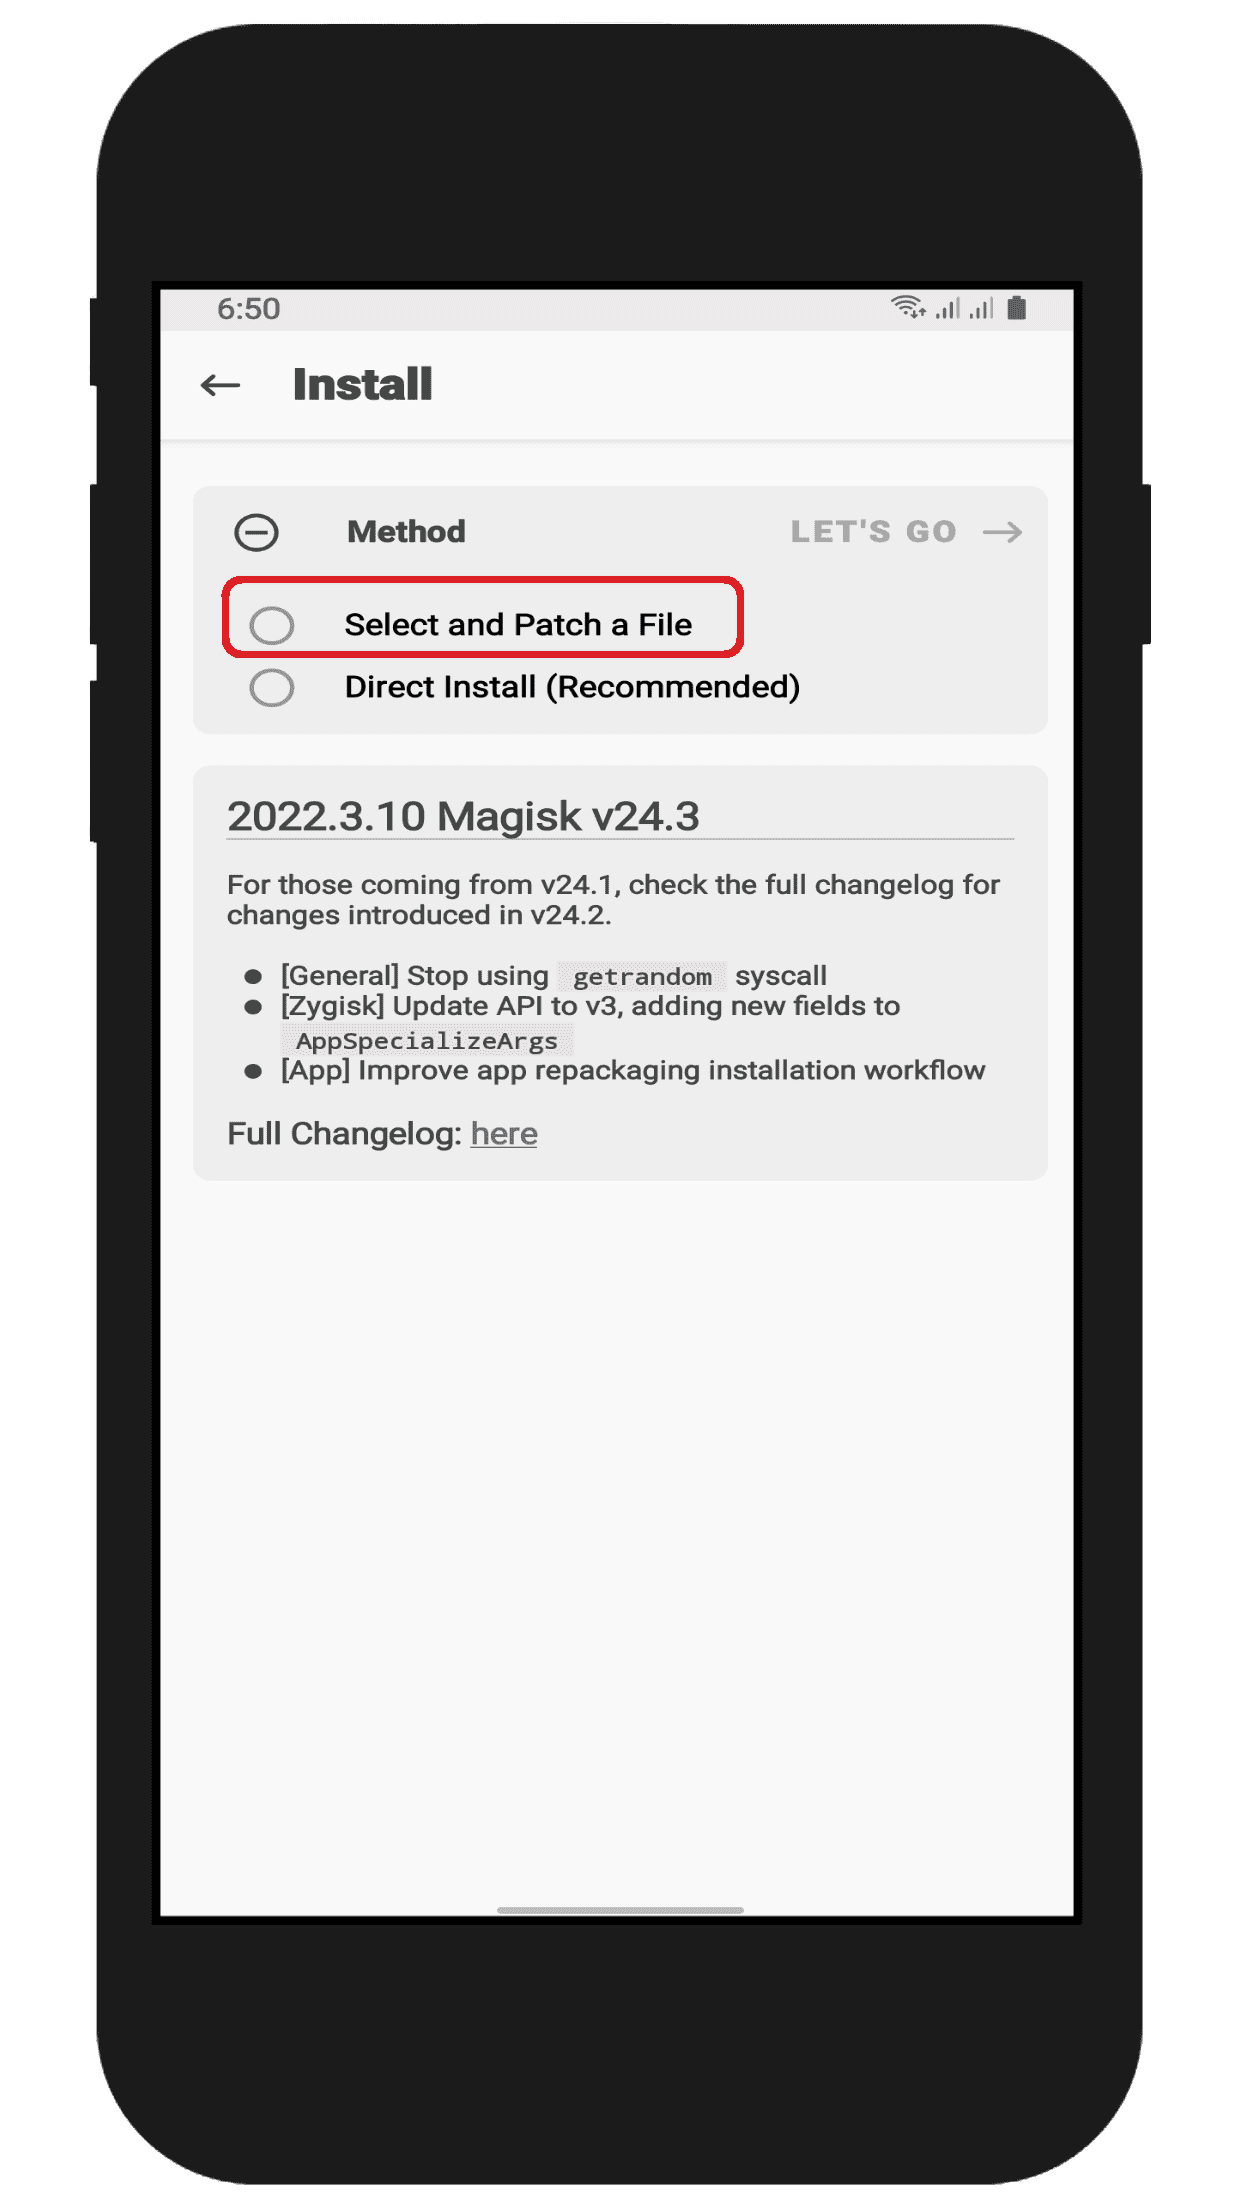
- Open the Magisk app.
- In the Magisk app, tap on the Install button.
- Select Patch a file.
- Select the AP firmware file that you extracted in the previous step.
- The Magisk app will start patching the AP firmware file.
- Once the patching is complete, you will see a message saying that the AP firmware file has been patched.
- The patched file will be located in the Downloads folder.
- Connect your phone to the PC and copy the magisk_patched.tar file to your PC.
 using Magisk 12")
Step 6: Booting into Download Mode
To boot your Samsung Phone into download mode, follow these steps:
- Power off your phone.
- Press and hold the Volume Down button and the Power button at the same time.
- Keep holding the buttons until you see the bootloader warning screen.
- If your device’s bootloader is already unlocked, just press one time volume up button.
- Following this method, you enter to download mode.
 using Magisk 15")
Step 7: Flashing the Patched AP Firmware Using Odin to Root Your Phone
To flash the patched AP firmware using Odin to root your phone, follow these steps:
- Run Odin Tool.
- Reboot your phone into download mode.
- Connect your Samsung Phone device to a PC/Laptop.
- You will see the ID:COM section light up blue. This means the port is working.
- In Odin Tool, select the following files:
- BL: The firmware file starting with BL.
- AP: The Magisk patched AP firmware file (magisk_patched.tar).
- CP: The firmware file starting with CP.
- CSC: The firmware file starting with CSC.
- Click Start to begin the flashing process.
- The first boot will take some time.
- After the phone boots up, Install Magisk app and enjoy your rooted phone.
 using Magisk 17")
Note: Some Samsung devices do not boot with the latest Magisk. If you face a bootloop issue with the latest Magisk, try using an older version.
Disclaimer: Rooting your phone can void your warranty and make your phone unstable. It is important to proceed with caution and to understand the risks involved before rooting your phone.
Conclusion
In this article, we have shown you how to root your Samsung Phone using Magisk and Odin tool without recovery.
We hope this guide was helpful! If you have any questions, please feel free to leave a comment below. We’re always happy to help.

Excellent instructions, I followed them step-by-step and successfully rooted my phone.
Glad to hear that the instructions worked well for you and that you were able to successfully root your phone! Thank you for taking the time to leave a comment and let us know. If you have any further questions or need any assistance, feel free to reach out.
The method mentioned earlier did not work for me, but I was able to successfully patch and use the entire AP file. Thank you for the helpful tutorial!
I also tested the method on three phones with varying price ranges, and when I patched the boot.img and flashed it, it worked perfectly. It seems that only patching the boot.img with Magisk is sufficient for rooting Samsung phones, and there’s no need to patch the vbmeta.img file as well.
I dont know if I did something wrong but patching the boot.img definitely did nothing on my phone. It just passed on the odin tool then after rebooting the erasing ui appears for less than a second then dissappears and system is still unrooted.The samsung device am using is Samsung Galaxy AO4e SM-AO2F the latest update now.
Thanks for reaching out! It’s possible that there was an issue with the patching process or with the specific version of Magisk that you used. In order to root your Samsung Galaxy A04e SM-A02F, you need to patch the boot.img file with Magisk and flash it onto your device using Odin. Magisk modifies the boot.img and the ramdisk inside it, which allows it to gain root access.
It’s important to note that simply patching the boot.img is not enough to root your device – you also need to flash the patched boot.img onto your device using Odin. Additionally, if you want to use Magisk to manage your root access, you need to install Magisk app on your device after rooting.
I hope this helps clarify the process for you. Let me know if you have any further questions!
Great tutorial! I was able to root my Samsung Galaxy successfully using your guide. It was clear, concise, and easy to follow. I especially appreciate that you included screenshots for each step. I would definitely recommend your guide to anyone looking to root their Samsung Galaxy.
I have completed all the necessary tasks, but an error has occurred related to the vbmeta. Specifically, there is a verification error, a mismatch, and the ‘verification disabled’ bit is set in the custom vbmeta (ABV fail).
To resolve the VBmeta error, follow these steps:
Hi Bishal, thanks for the tutorial. I also got “Verifying VBMeta Image OK_NOT_SIGNED(3) Error”.
So to clarify, we need to select vbmeta.tar file instead of the pacthed file for the AP section during flashing process?
Thanks
Yes, you need to flash vbmeta.tar before flashing the Magisk-patched boot image.
HI Bishal Pokhrel,
Thank you for the useful article. I try to root my Samsung Galaxy P585Y with Magisk. After flashing with the Odin tool, the phone rebooted and during installation, I got the error message. I have reset devices however the phone is rooted when checked with root checker. The problem is I can run adb root command ( adb command can not run the production build).None of the adb_root modules or adb installer.apk is working. How can I solve this issue?