If you’re a Samsung Galaxy A21s user looking to unlock the full potential of your device, then you’re in the right place! In this guide, I’ll take you through the process of rooting your Samsung Galaxy A21s using Magisk.
Rooting your device gives you administrative privileges, which means you can tweak the software to your liking and unleash the full potential of your phone. This includes customizing the look and feel of your phone, installing apps that require root access, and improving the performance and battery life of your phone.

I’ll be showing you two methods to root your Samsung Galaxy A21s – one with TWRP recovery and one without TWRP recovery. TWRP is a custom recovery that allows you to flash magisk zip, custom ROMs, kernels, and mods. If you’re new to rooting, I recommend using TWRP recovery.
Whether you’re a seasoned rooting veteran or a newcomer, this guide will provide you with all the information you need to get started. So, let’s dive in and unlock the full potential of your Samsung Galaxy A21s!
Table of Contents
Root Samsung Galaxy A21s with TWRP Recovery
To root your Samsung Galaxy A21s with TWRP Recovery, you will need to install TWRP Recovery first. TWRP Recovery is a custom recovery that allows you to flash magisk zip, custom ROMs, kernels, and mods.
Step 1: Install TWRP Recovery
We have written a full guide on how to install TWRP Recovery on the Samsung Galaxy A21s. You can check it out at the link below.
Check this: How to Install TWRP on Samsung Galaxy A21s
Step 2: Flash Magisk ZIP File using TWRP
Once TWRP Recovery is installed, you can flash the Magisk ZIP file to root your phone using TWRP. The Magisk ZIP file is a mod that allows you to gain root access on your phone. You can download the Magisk ZIP file from below button.
Here are the steps on how to flash the Magisk ZIP file using TWRP:
- Boot your phone into TWRP Recovery.
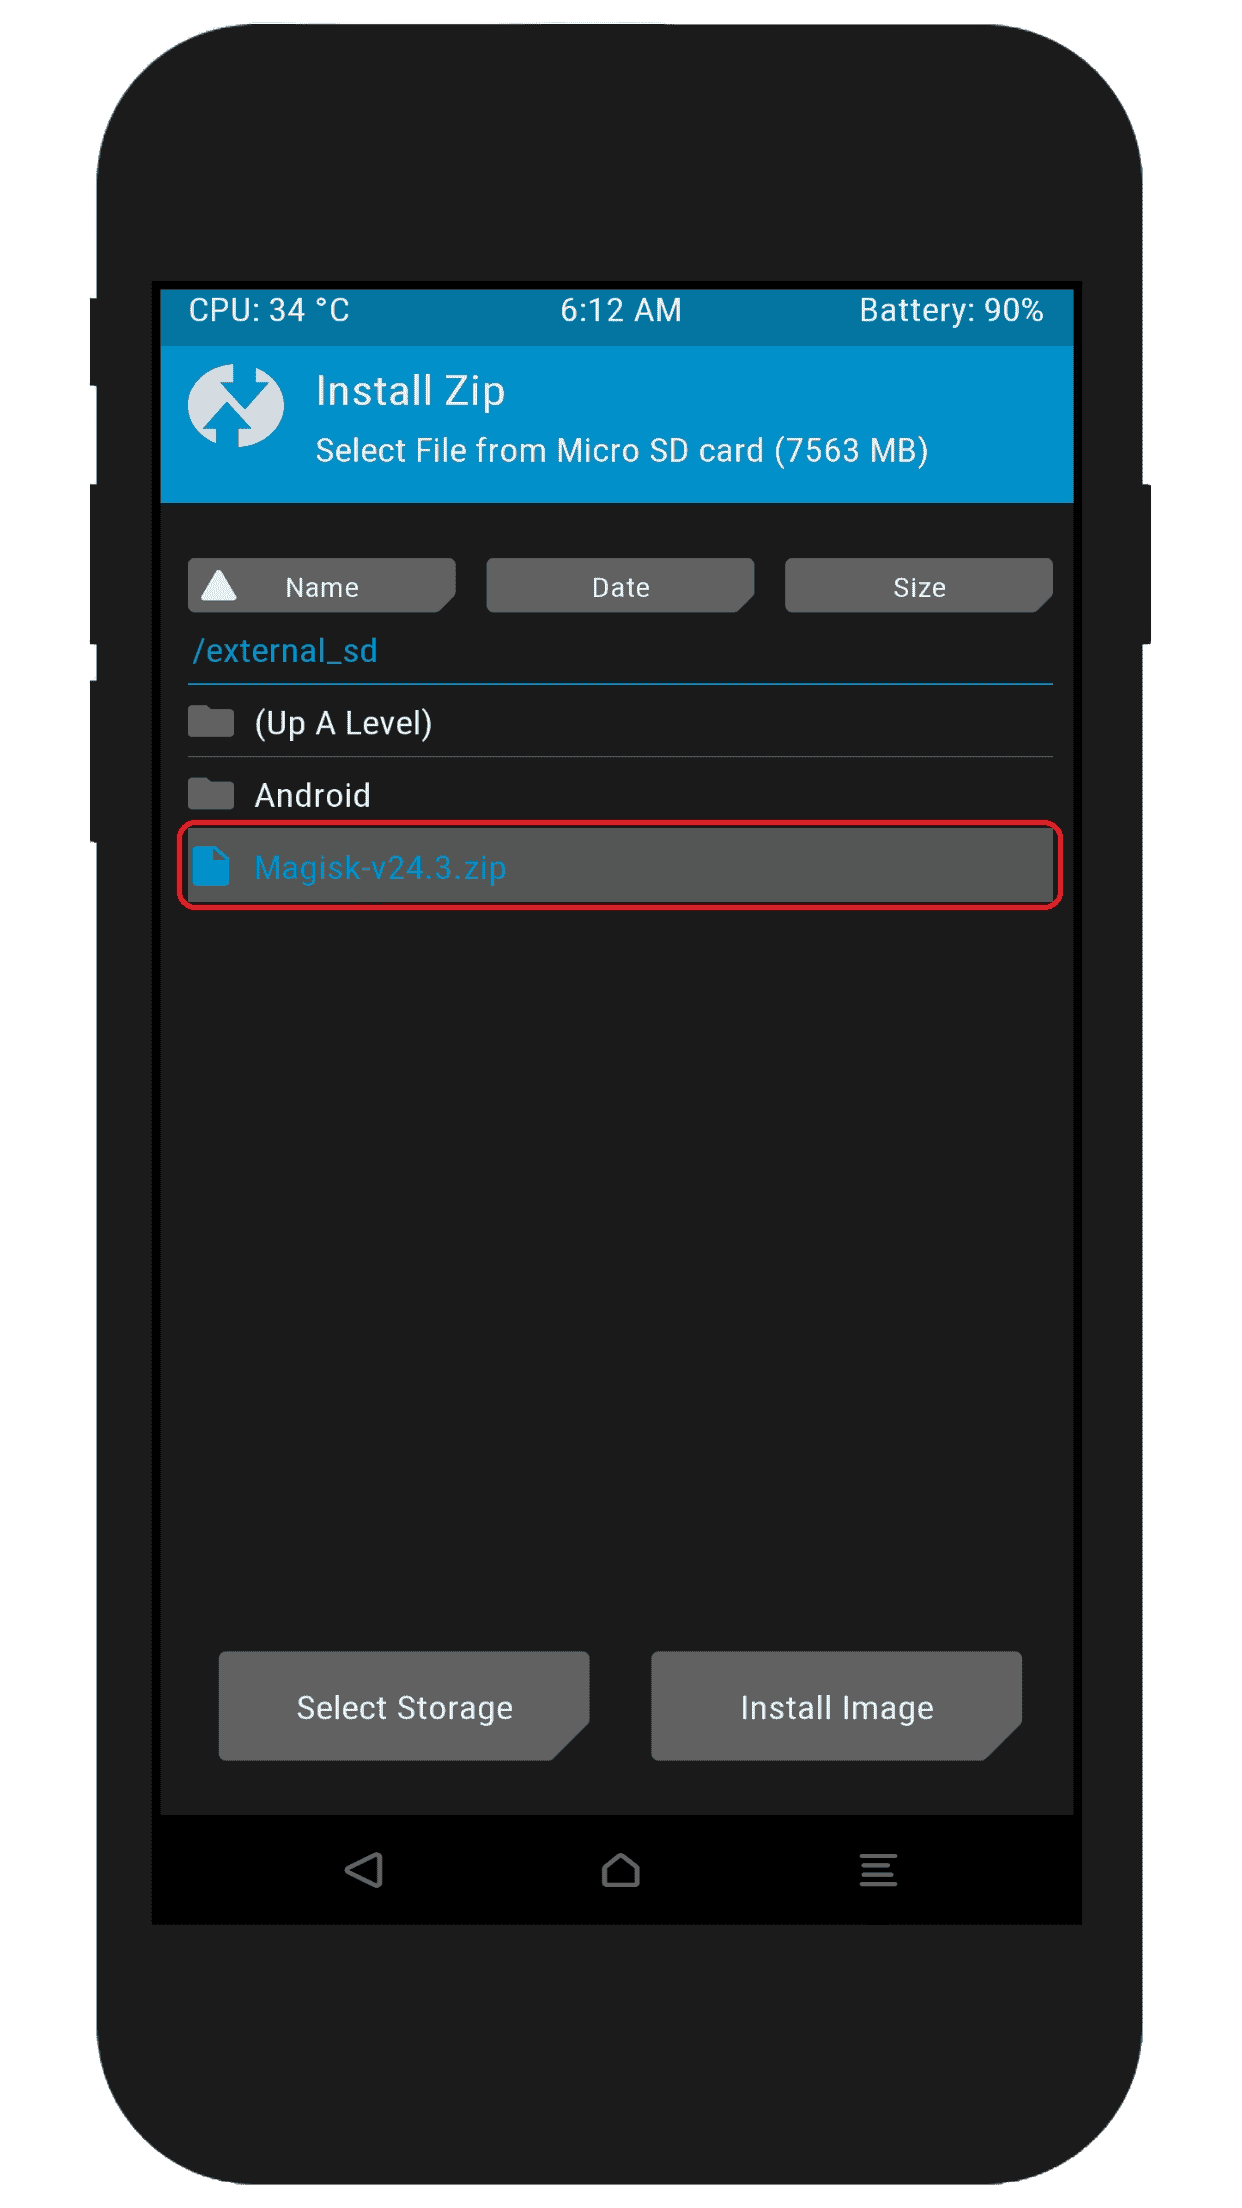
- In TWRP Recovery, tap on the Install button.
- Select the Magisk ZIP file.
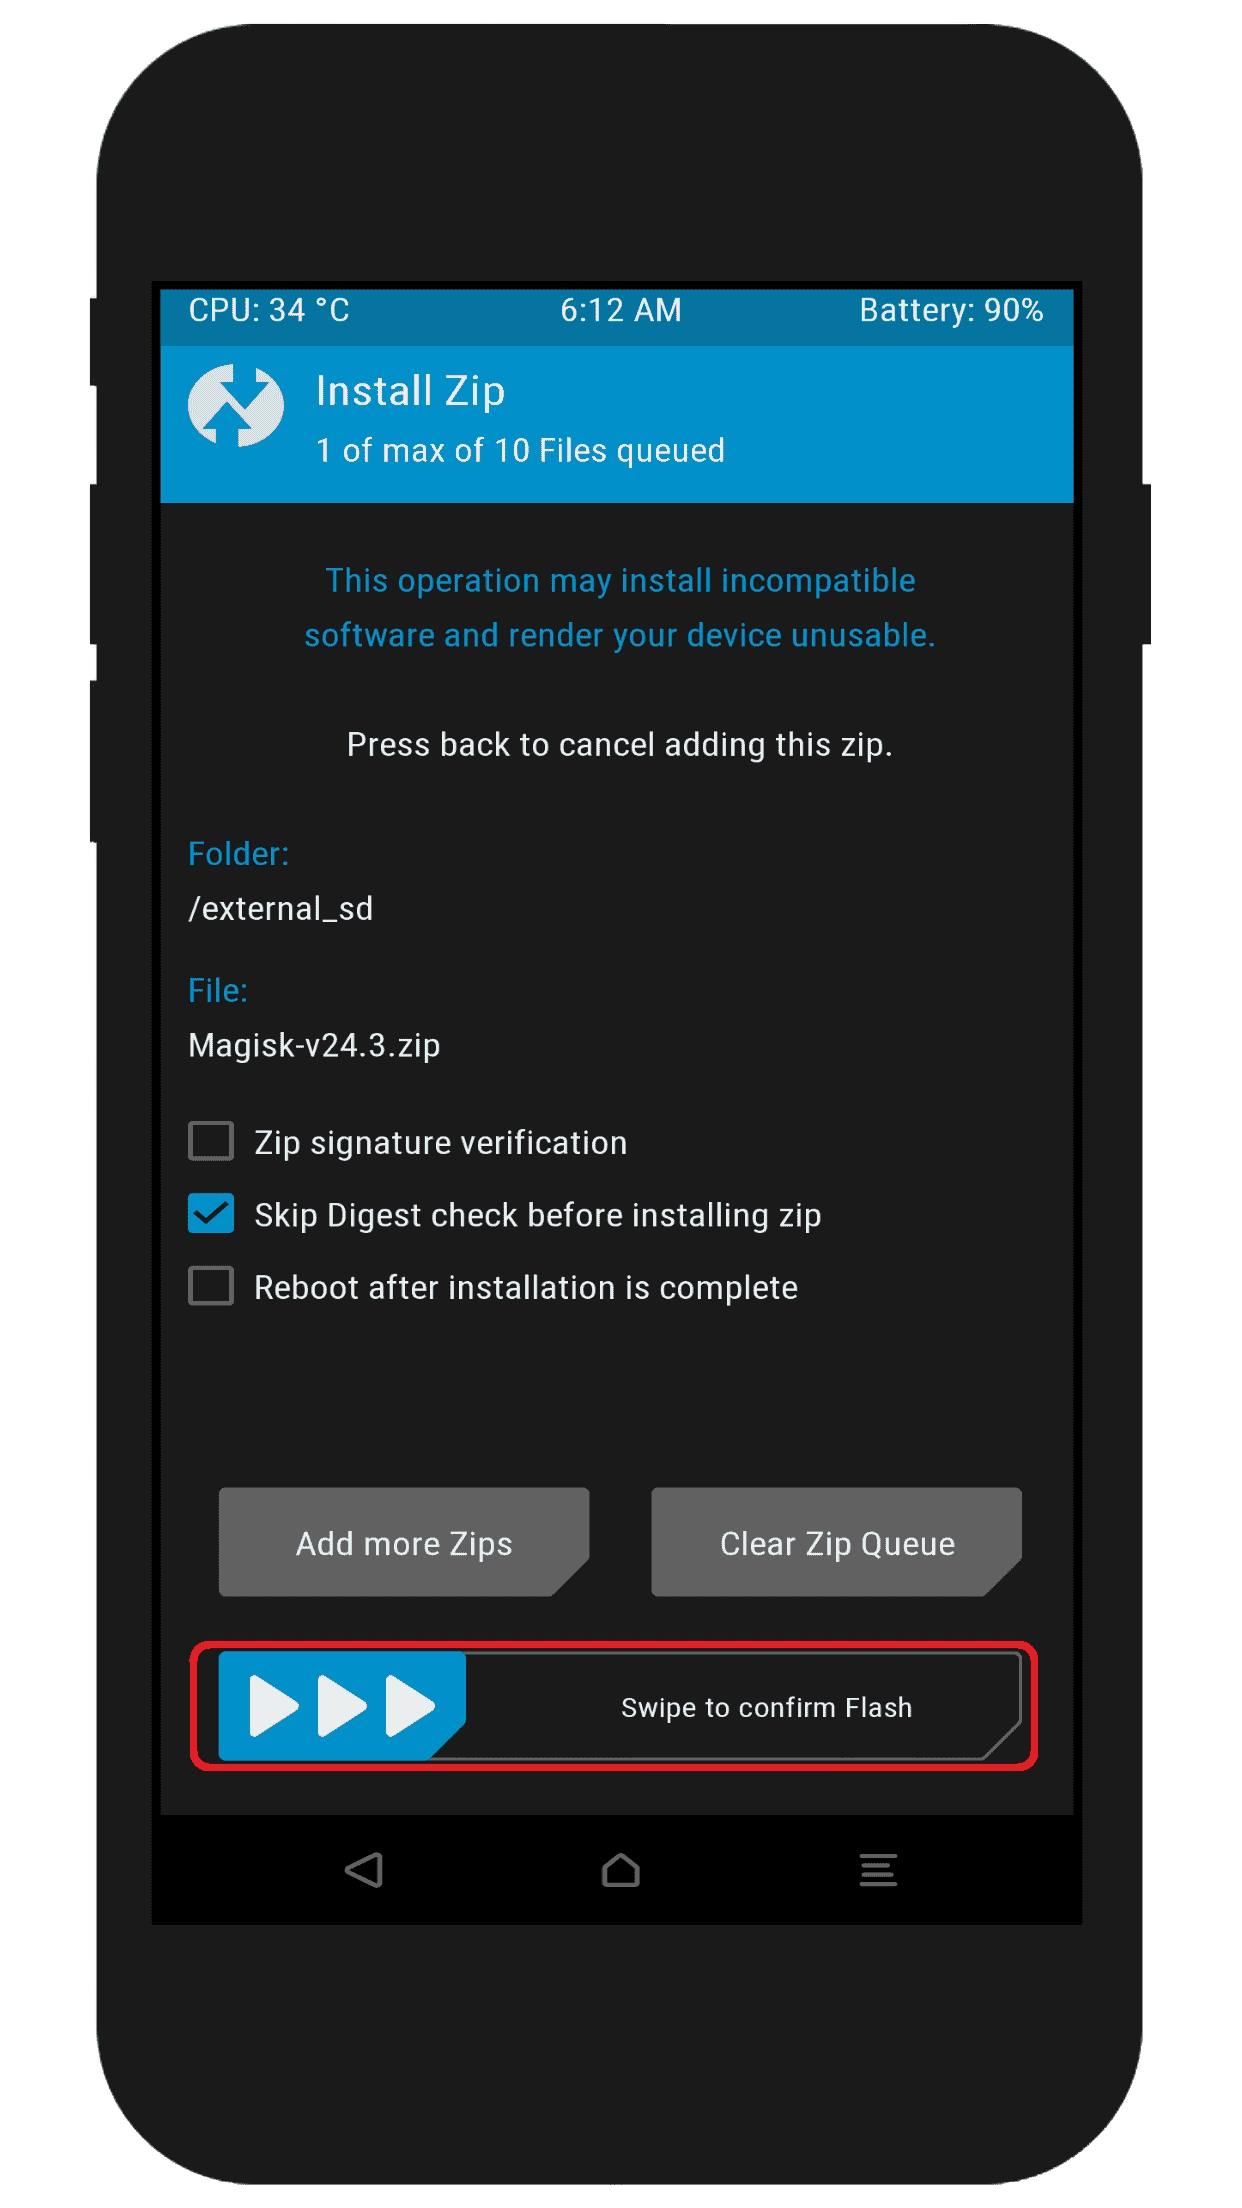
- Tap on the Swipe to confirm flash button.
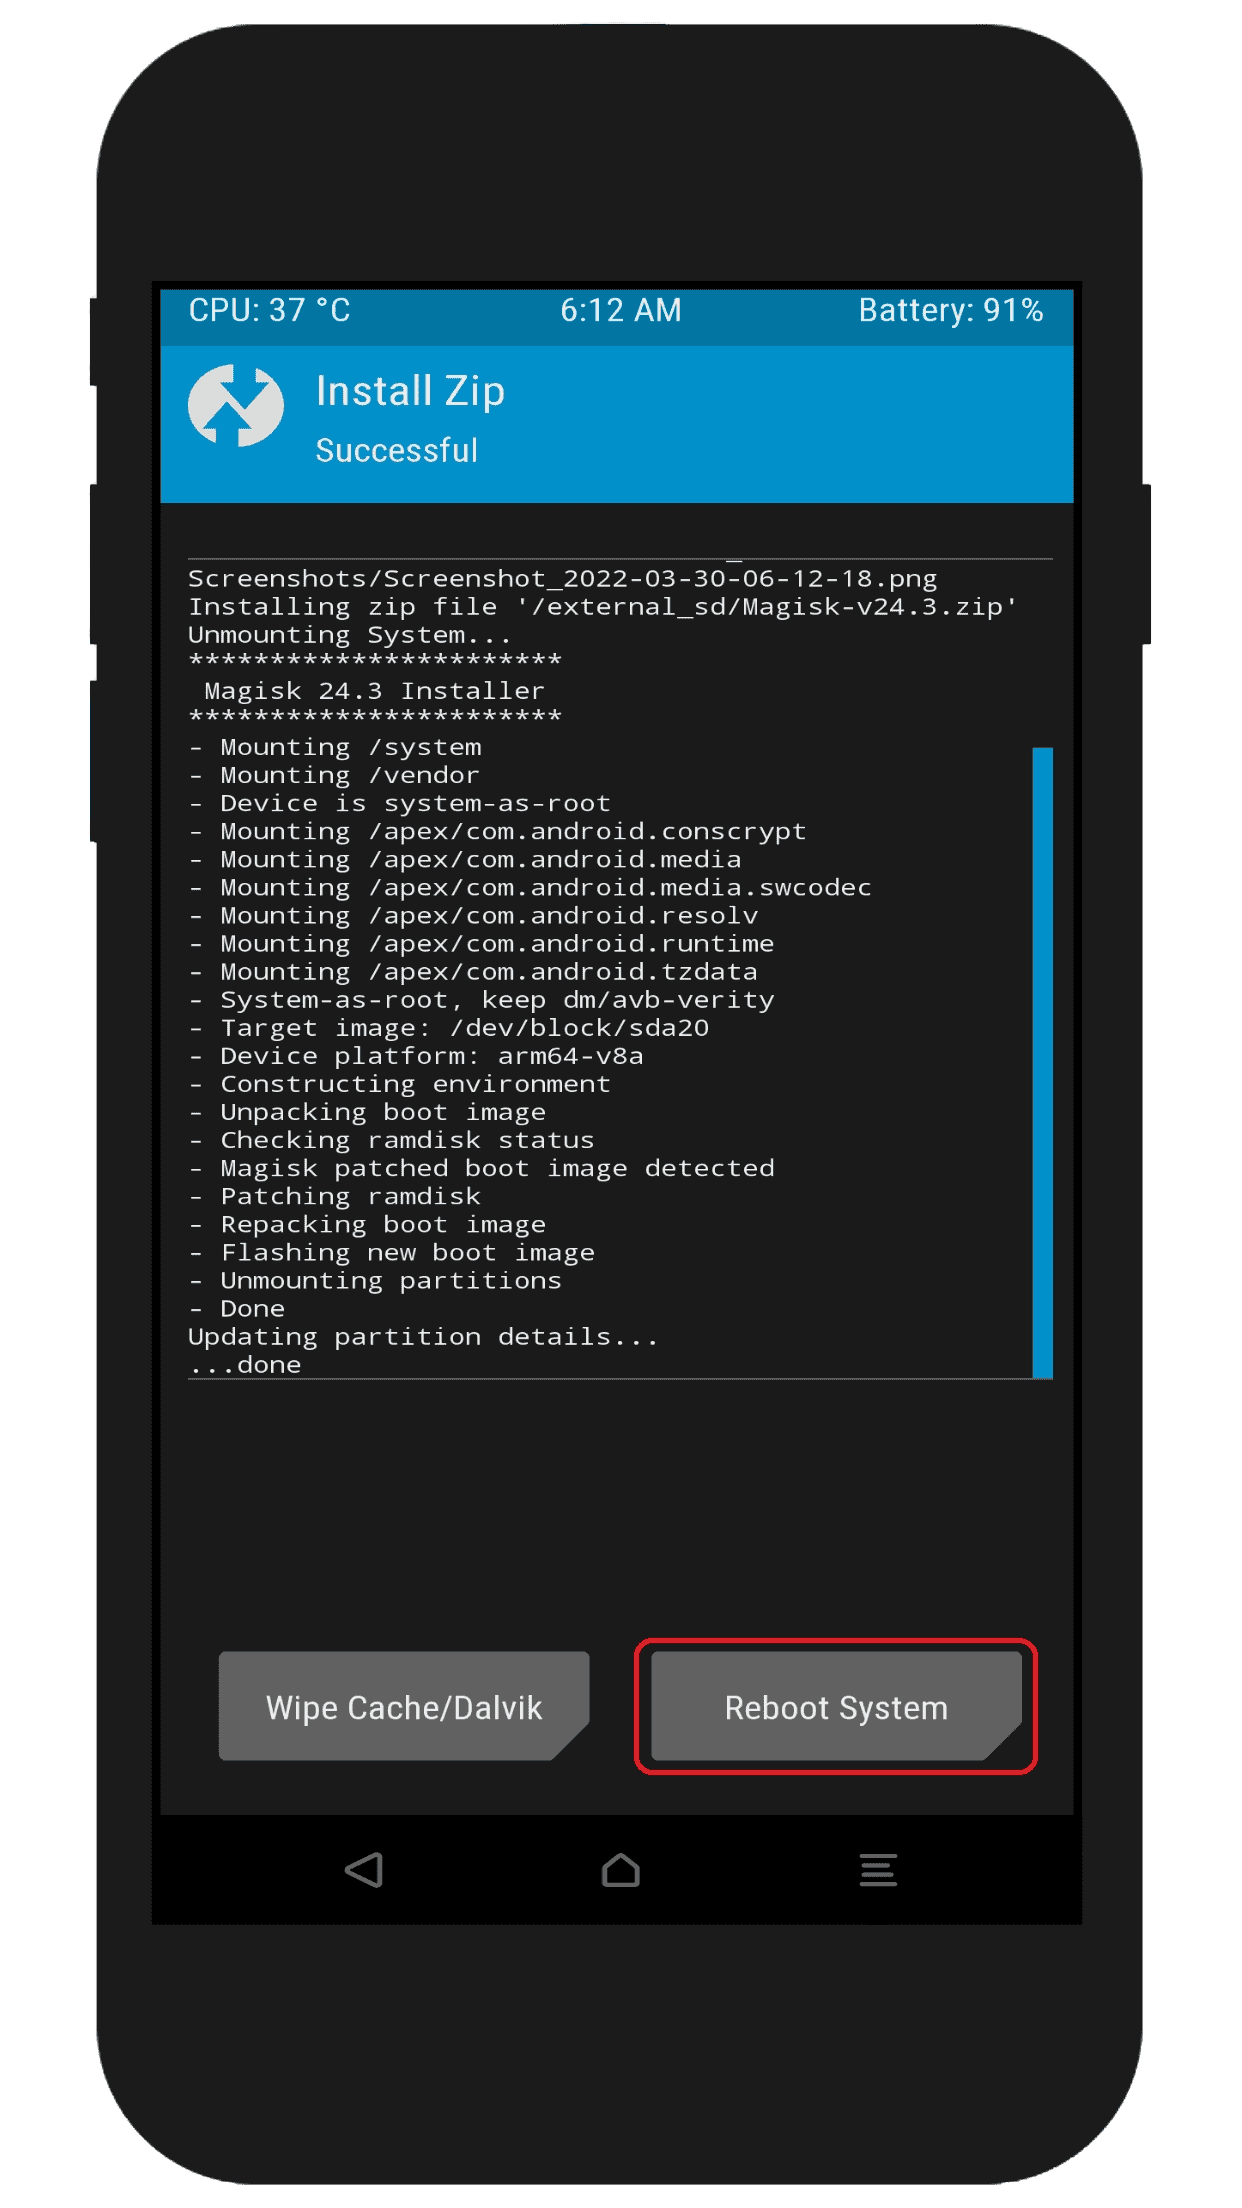
- TWRP will start flashing the Magisk ZIP file. This process may take a few minutes.
- Once the flashing process is complete, reboot your phone.
- After the phone boots up, Install Magisk app and enjoy your rooted phone.
 using Magisk 2")
Your phone is now rooted! You can verify this by installing the Root Checker app from the Google Play Store.
Rooting Samsung Galaxy A21s without TWRP Recovery
In this guide, I will show you how to root your Samsung Galaxy A21s without using TWRP recovery. This process is a bit more complicated than rooting with TWRP, but it is still possible with careful attention to the steps.
Step 1: Enabling Developer Options
To enable Developer Options on your Samsung Galaxy A21s, follow these steps:
- Go to Settings on your Samsung Galaxy A21s.
- Scroll down and tap on About phone.
- Tap on Software information.
- Tap on Build number 7 times.
- Enter your phone’s lock screen PIN or password.
- You will now see the “Developer mode has been enabled!” toast message on the phone screen.
Once Developer options is enabled, you can find it by scrolling down to the bottom of the Settings menu.
Step 2: Enabling the OEM Unlocking Option
To enable the OEM unlocking option on your Samsung Galaxy A21s, follow these steps:
- Go to Settings > Developer options.
- Toggle ON the OEM unlocking option.
 using Magisk 7")
Once the OEM unlocking option is enabled, you can unlock the bootloader of your phone.
Step 3: Unlocking the Bootloader
After enabling OEM unlocking, follow these steps to unlock the bootloader on your Samsung Galaxy A21s:
- Power off your phone.
- Press and hold the Volume Up and Volume Down buttons.
- Connect your phone to your PC using the data cable.
- Once you see the bootloader warning screen, press and hold the Volume Up button to unlock the bootloader on your device.
Note: The bootloader warning screen may say something like “Warning: Bootloader Unlocking will erase all data on your phone. Are you sure you want to continue?” You must press the Volume Up button to confirm that you want to unlock the bootloader.
Step 4: Downloading Stock Firmware
Before we proceed with rooting your Samsung Galaxy A21s, it’s important to have the correct stock firmware for your device.
To download the stock firmware for your Samsung Galaxy A21s using the Frija tool, you will need to first click on the download button below to obtain the Frija tool.
Once you have downloaded the Frija tool, simply enter your phone model and CSC code into the tool, select the “Auto” option, click on “Check for updates,” and then click the “Download” button to retrieve the firmware.
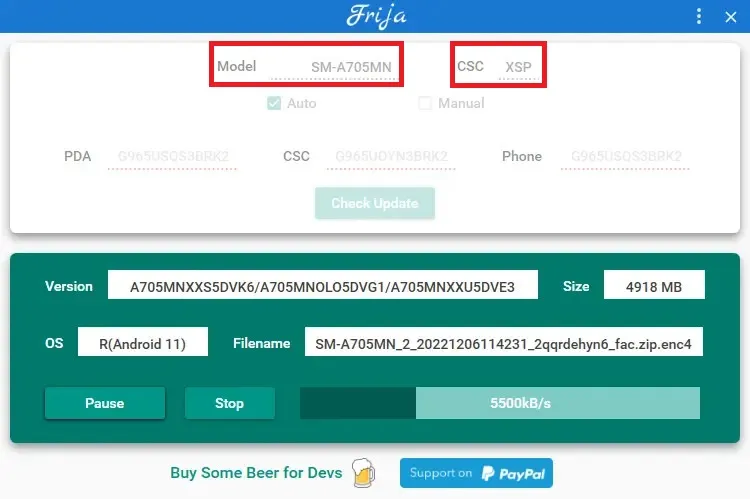
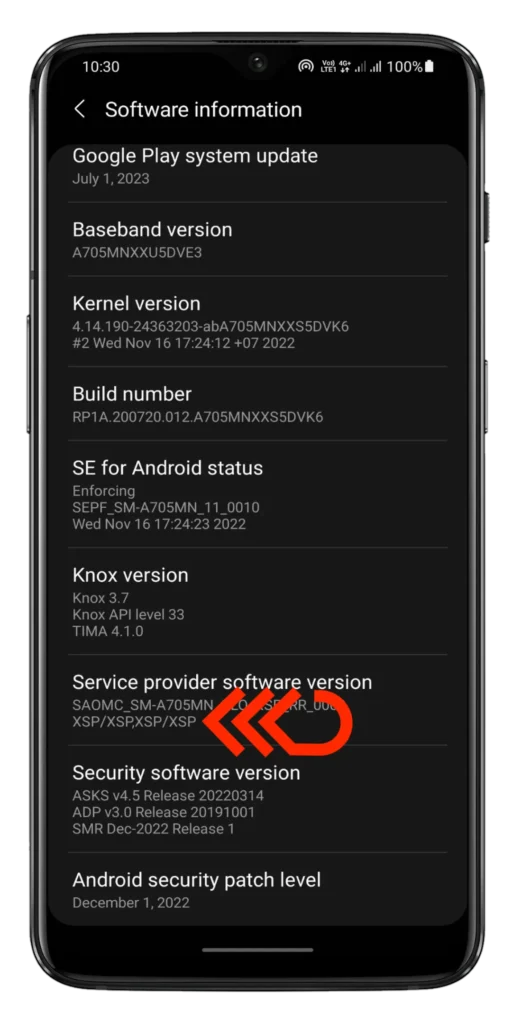
You can find your phone’s model number by going to Settings > About phone. The CSC code can be found in the About phone section, under Software information.
Step 5: Extracting and Patching the Firmware with Magisk
Once you have downloaded the stock firmware for your Samsung Galaxy A21s, you need to extract it and patch the AP firmware with Magisk.
To extract the firmware:
- Open the firmware file using a zip extractor tool.
- You will see a folder with the firmware files.
- The AP firmware file is the file that you need to patch with Magisk.
To patch the AP firmware with Magisk:
To patch the AP firmware with Magisk, begin by downloading the Magisk app. Once the download is complete, proceed to install the app on your device. After installation, follow the provided guide for the patching process.
- Open the Magisk app.
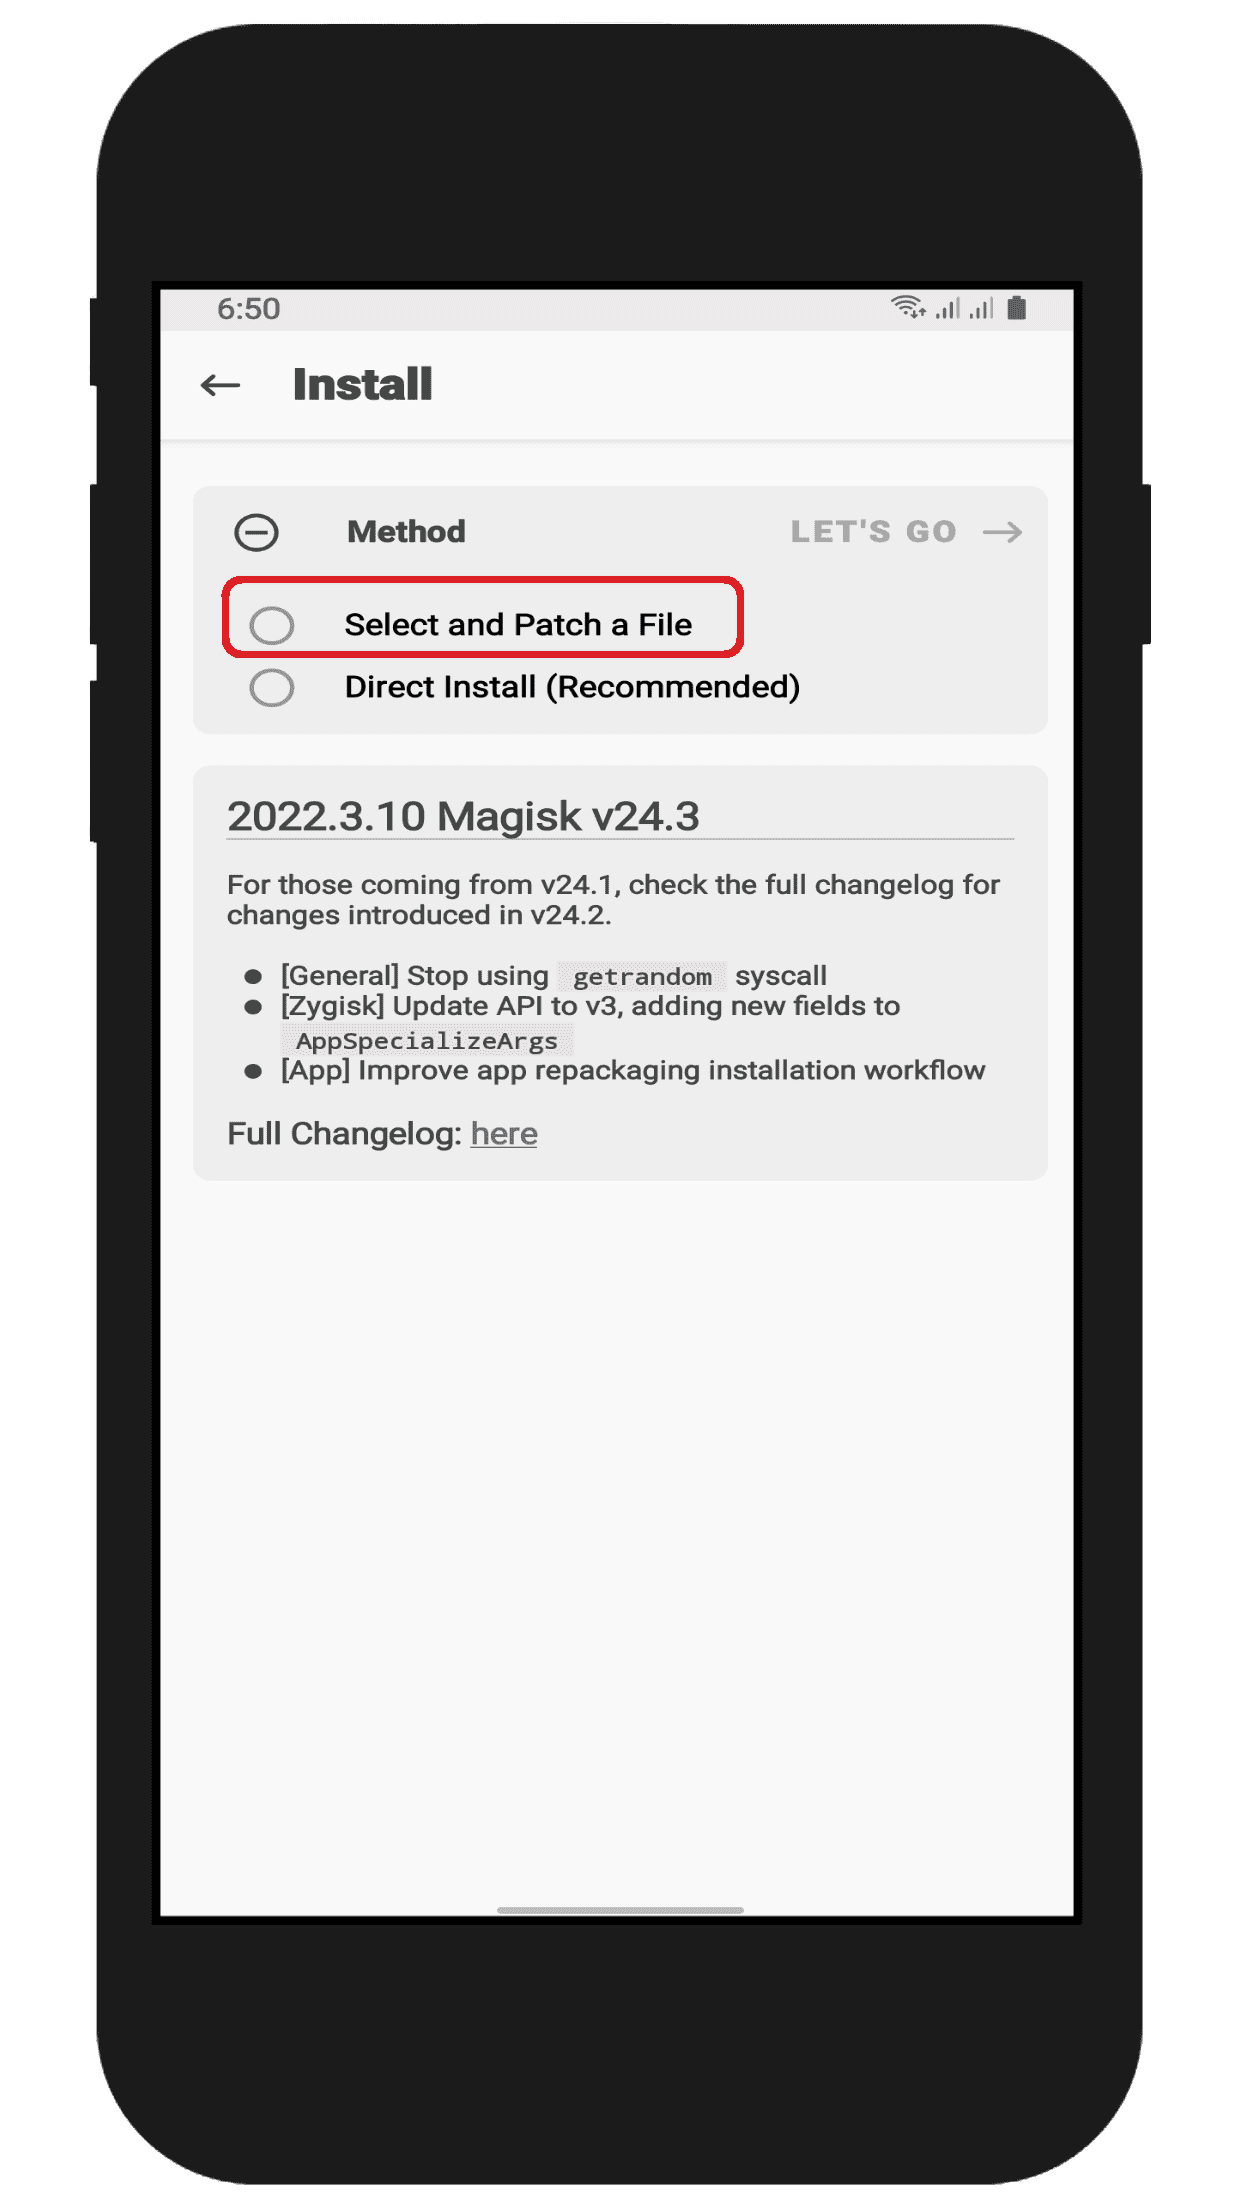
- In the Magisk app, tap on the Install button.
- Select Patch a file.
- Select the AP firmware file that you extracted in the previous step.
- The Magisk app will start patching the AP firmware file.
- Once the patching is complete, you will see a message saying that the AP firmware file has been patched.
- The patched file will be located in the Downloads folder.
- Connect your phone to the PC and copy the magisk_patched.tar file to your PC.
 using Magisk 12")
Step 6: Booting into Download Mode
To boot your Samsung Galaxy A21s into download mode, follow these steps:
- Power off your phone.
- Press and hold the Volume Down button and the Power button at the same time.
- Keep holding the buttons until you see the bootloader warning screen.
- If your device’s bootloader is already unlocked, just press one time volume up button.
- Following this method, you enter to download mode.
 using Magisk 15")
Step 7: Flashing the Patched AP Firmware Using Odin to Root Your Phone
To flash the patched AP firmware using Odin to root your phone, follow these steps:
- Run Odin Tool.
- Reboot your phone into download mode.
- Connect your Samsung Galaxy A21s device to a PC/Laptop.
- You will see the ID:COM section light up blue. This means the port is working.
- In Odin Tool, select the following files:
- BL: The firmware file starting with BL.
- AP: The Magisk patched AP firmware file (magisk_patched.tar).
- CP: The firmware file starting with CP.
- CSC: The firmware file starting with CSC.
- Click Start to begin the flashing process.
- The first boot will take some time.
- After the phone boots up, Install Magisk app and enjoy your rooted phone.
 using Magisk 17")
Note: Some Samsung devices do not boot with the latest Magisk. If you face a bootloop issue with the latest Magisk, try using an older version.
Disclaimer: Rooting your phone can void your warranty and make your phone unstable. It is important to proceed with caution and to understand the risks involved before rooting your phone.
Conclusion
In this article, we have shown you how to root your Samsung Galaxy A21s using Magisk, with TWRP custom recovery and without recovery.
We hope this guide was helpful! If you have any questions, please feel free to leave a comment below. We’re always happy to help.