Hey there! Are you the proud owner of a Samsung Galaxy A9 2018? If you’re looking to get even more out of your phone, installing a custom recovery like TWRP, OrangeFx, or SHRP is a great place to start.
Now, before we dive into the process, it’s important to know that installing a custom recovery will void your warranty and can be risky if not done properly. But don’t worry, we’ve got you covered. We’ll guide you step by step on how to install TWRP recovery on your Samsung Galaxy A9 2018 safely and easily.

So, if you’re ready to unlock the full potential of your phone and give it some extra power, read on.
Table of Contents
Preparing Your Samsung Galaxy A9 2018 for TWRP Recovery Installation
Should this Remember
- Disable Security Locks: Make sure to turn off any security locks on your device.
- Full Backup: Take a full backup of your phone’s data and files to avoid any loss during the installation process.
- PC & USB Cable: You will need a PC and the original USB cable for your Samsung Galaxy A9 2018 to connect the device to the PC for the installation.
- Fully Charged Phone: Ensure that your phone is fully charged to avoid any interruption during the installation.
Enabling Developer Mode on Samsung Galaxy A9 2018
- Go to “Settings” on your phone.
- Scroll down to the bottom of the screen and select “About phone.”
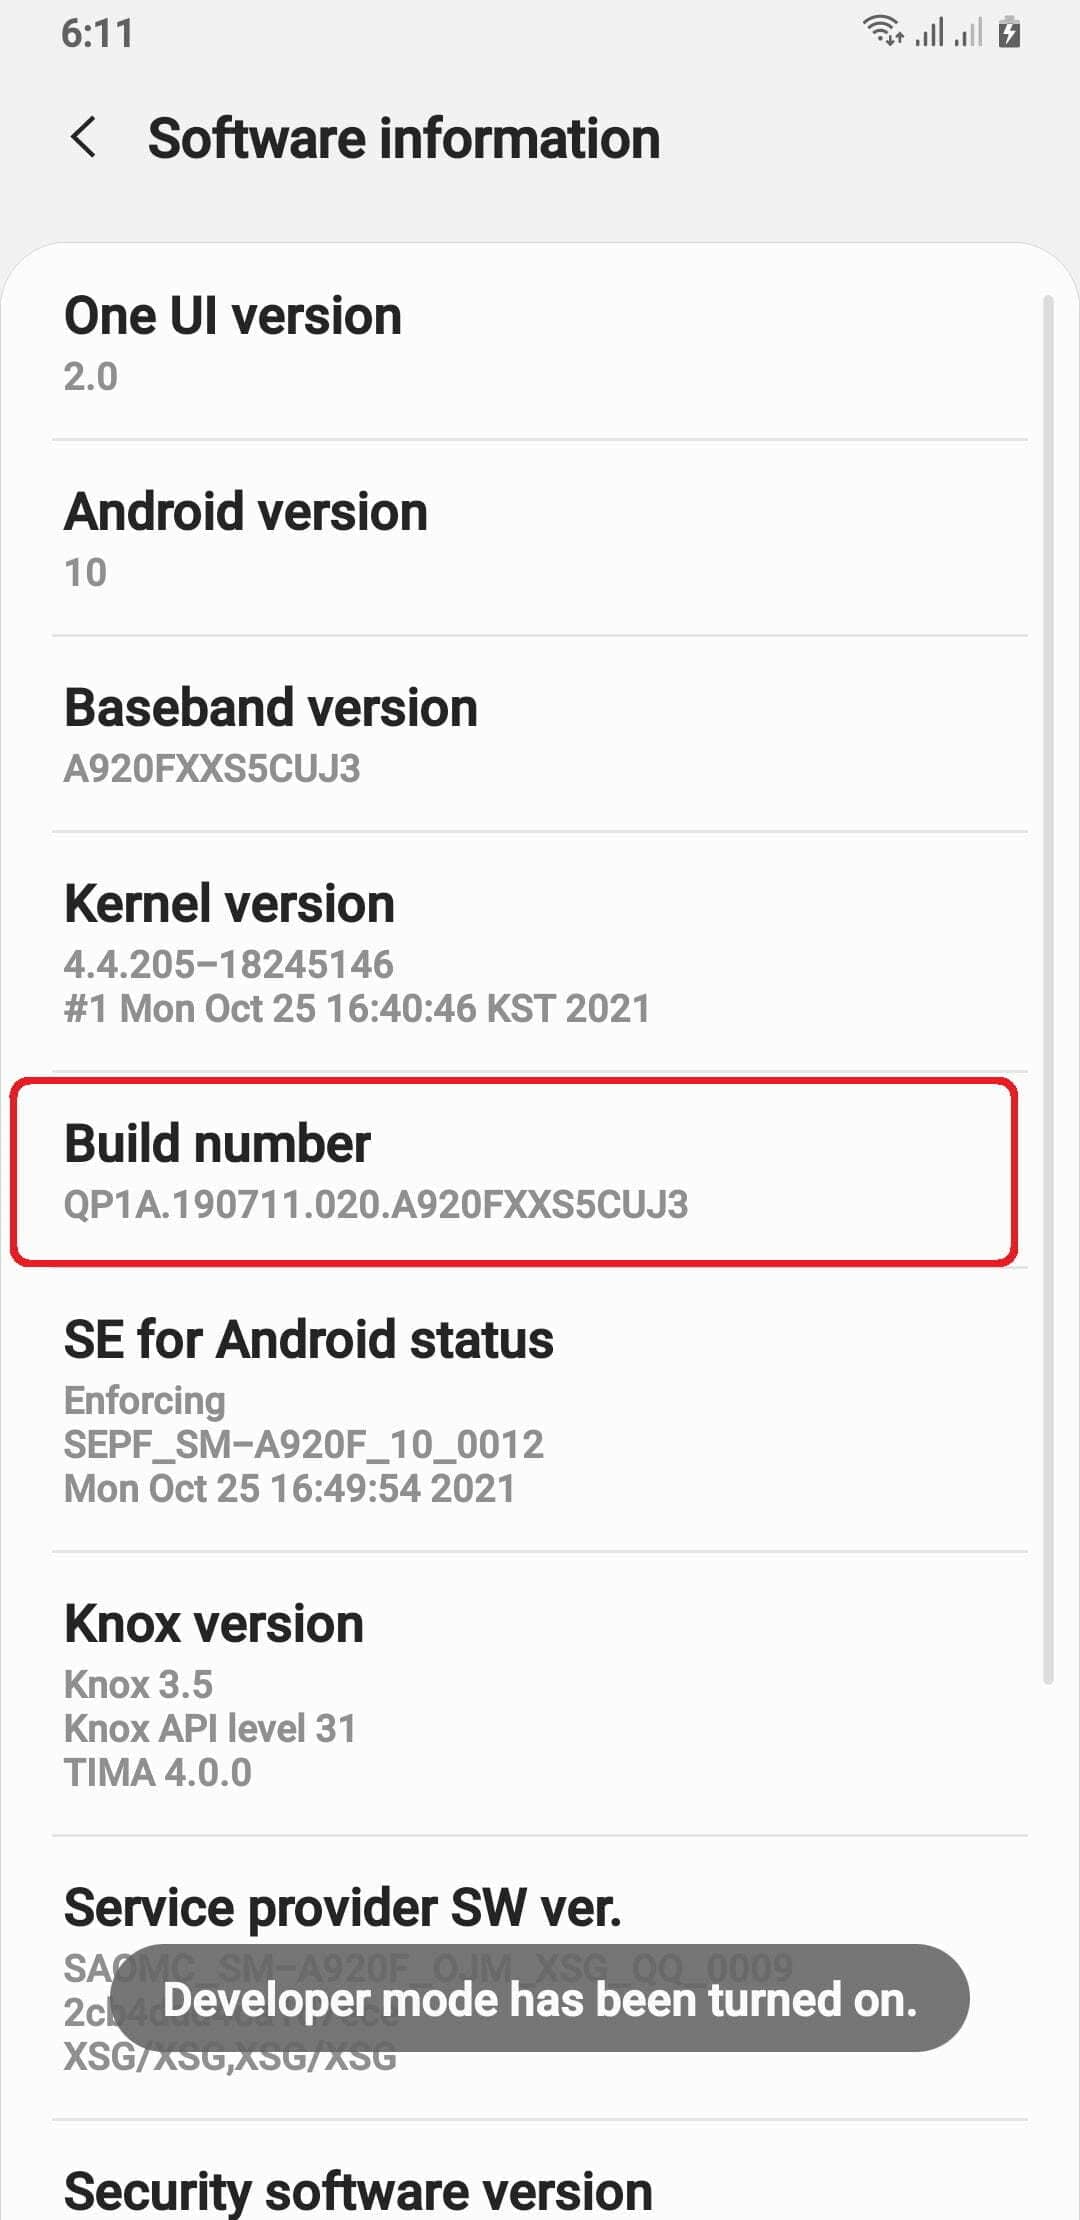
- Choose “Software information.”
- Enter your lock screen password if prompted.
- You should now see the message “Developer mode has been enabled!” on the screen.
By following these steps, you have successfully enabled developer mode on your Samsung Galaxy A9 2018, which is an important step in the process of installing TWRP recovery.
Enabling OEM Unlocking on Samsung Galaxy A9 2018
- Go to “Settings” on your phone.
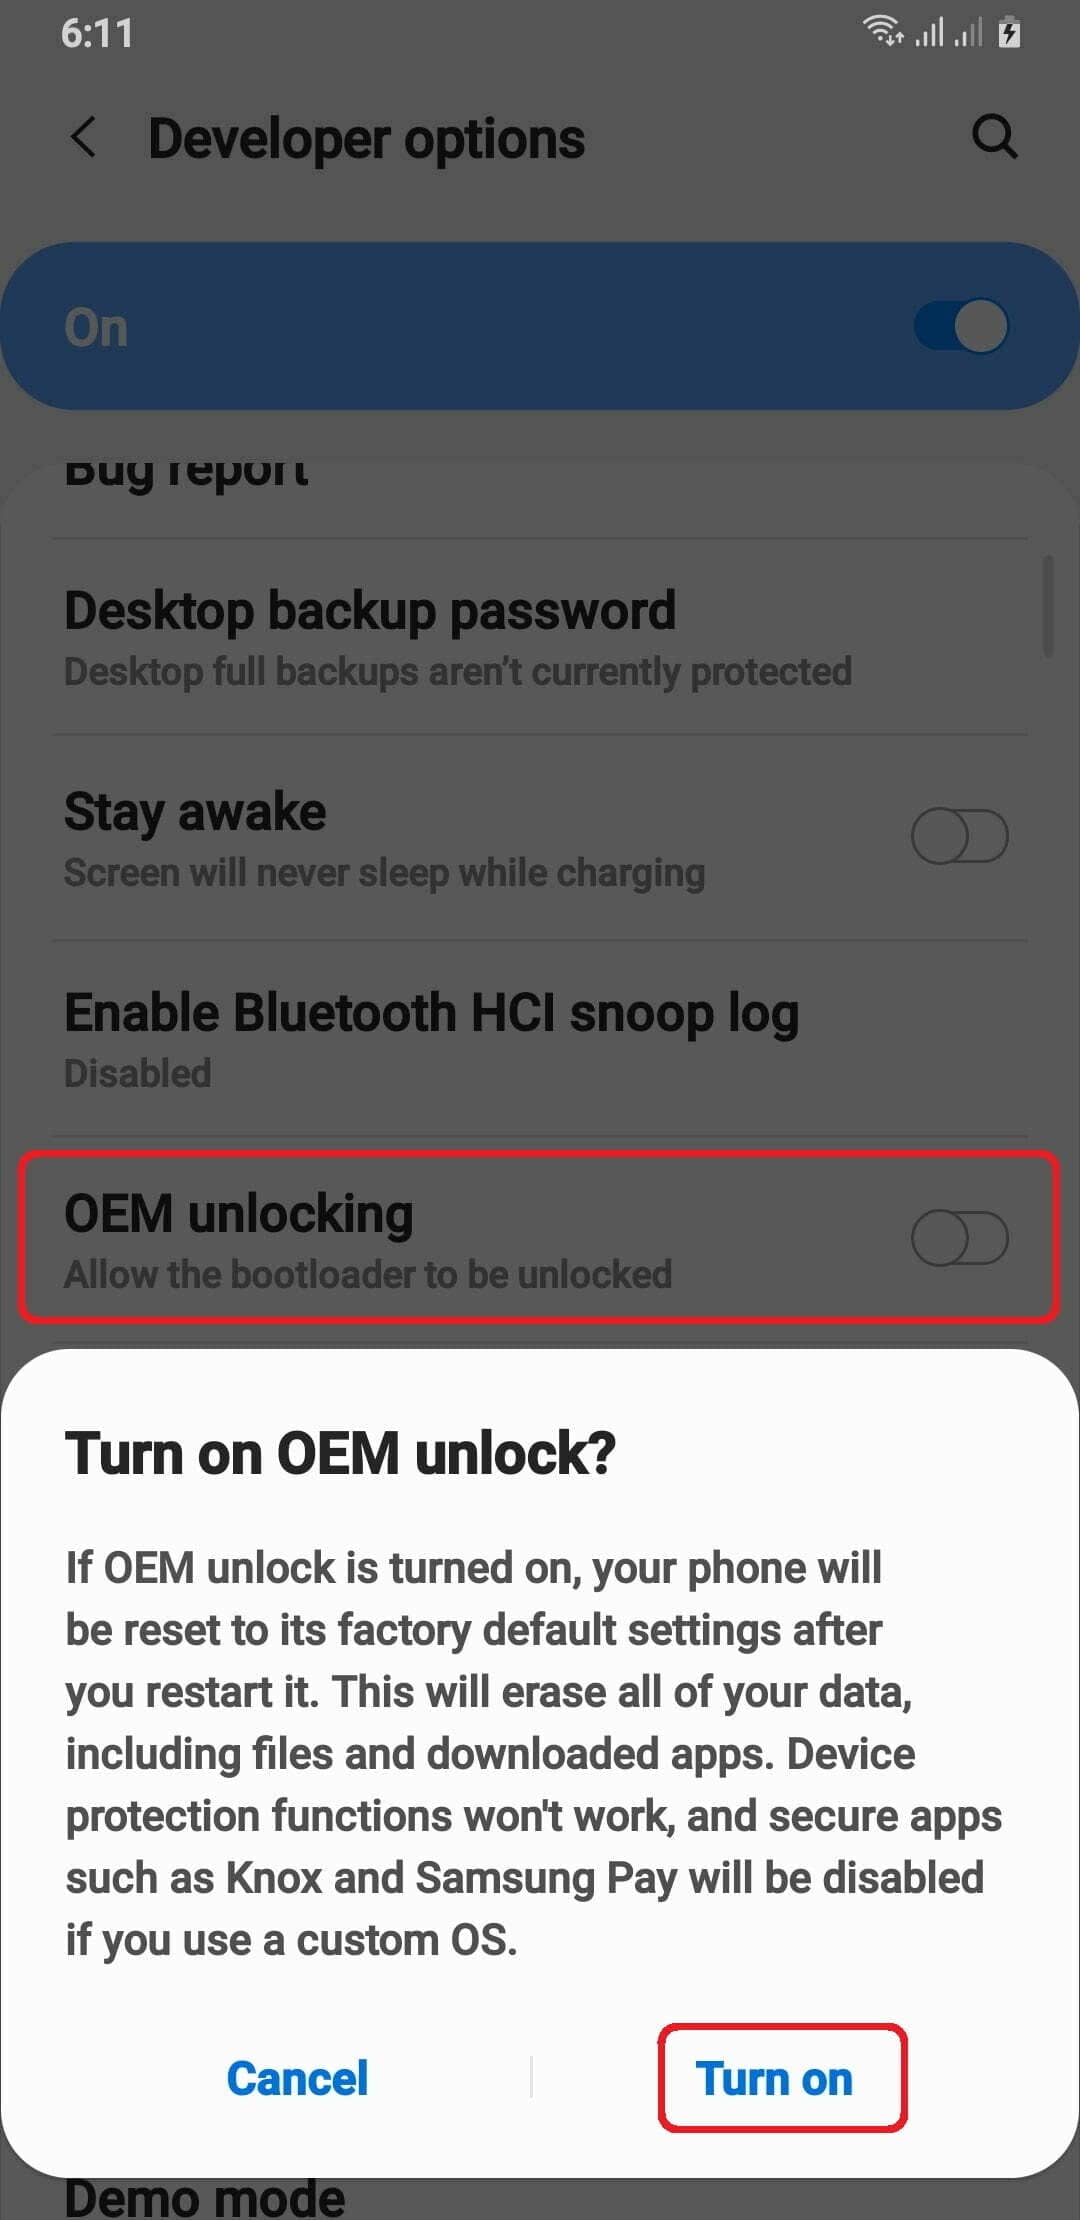
- Scroll down to the bottom and select “Developer options.”
- Locate the “OEM unlocking” option and turn it on.
- You may be prompted to enter your lock screen password.
- After enabling OEM unlocking, your Samsung Galaxy A9 2018 is now ready to have a custom recovery like TWRP installed.
By following these simple steps, you have successfully enabled OEM unlocking on your Samsung Galaxy A9 2018, which is an essential step in the process of installing TWRP recovery.
Unlocking the Bootloader on Samsung Galaxy A9 2018
Note: Enabling OEM unlocking on Samsung Galaxy A9 2018 may trigger an automatic factory reset and also unlock the bootloader.
Entering Download Mode on Samsung Galaxy A9 2018
- You need to first switch off your device.
- Now, keep pressing the “Volume Down”, “Bixby” and “Power” buttons simultaneously and don’t release until you see the “Warning” screen.
- Finally, press the “Volume Up” button and this way you will enter the download mode on your Samsung Galaxy A9 2018 device.
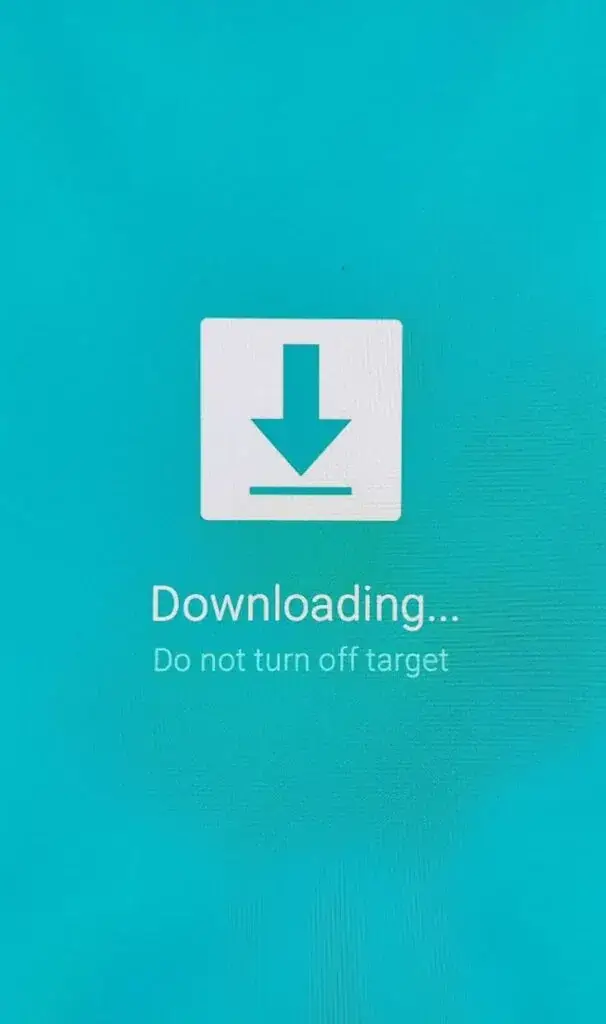
By following these steps, you have successfully entered Download mode on your Samsung Galaxy A9 2018, which is necessary to install TWRP recovery using Odin.
Downloading Required Files for TWRP Installation
Before proceeding with the TWRP installation, it’s important to download the following necessary files:
- Odin software to flash the recovery image to your phone.
- TWRP recovery image file for your Samsung Galaxy A9 2018 (choose .tar).
- Disable_Dm-Verity_ForceEncrypt package (optional).
- Samsung USB drivers to ensure proper connectivity between your PC and phone.
Make sure to download these files and have them readily available on your PC before proceeding with the TWRP installation process.
Installing TWRP on Samsung Galaxy A9 2018
Steps to Install TWRP on Samsung Galaxy A9 2018:
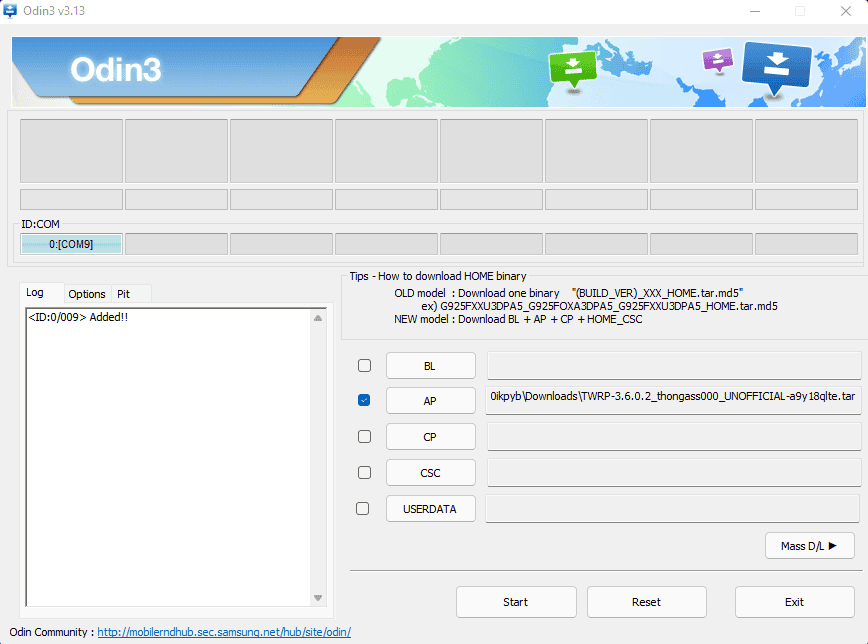
- Open Odin software on your PC.
- Connect your Samsung Galaxy A9 2018 to the PC using the original USB cable.
- In Odin, select the TWRP.tar file you downloaded in the AP section.
- Click the “Start” button to flash the TWRP recovery image to your phone.
- After the flashing process is complete, immediately reboot your phone into recovery mode by pressing the Volume Up, Bixby, and Power buttons simultaneously.
- In TWRP recovery, flash the Disable_Dm-Verity_ForceEncrypt.zip package (if needed).
- Navigate to Wipe > Format data and wipe the device’s data.
- Finally, reboot your phone to the system or flash any additional files as desired.
Note: If you want to install OrangeFx or SHRP instead of TWRP, simply download the recovery image in .tar format and follow the same steps as outlined above to flash it onto your Samsung Galaxy A9 2018.
Conclusion
In conclusion, installing a custom recovery such as TWRP, OrangeFx, or SHRP on your Samsung Galaxy A9 2018 is a great way to customize and enhance your device’s capabilities. However, it’s important to understand that this process does come with certain risks and may void your warranty. Make sure to follow the instructions carefully and backup your device’s data before proceeding. If done correctly, you’ll be able to enjoy the benefits of a custom recovery in no time.


Hi
Hello, How can I help you
I need download link of twrp recovery.
Can u plz.
Just end of the article you found the download link. TWRP and Disable Force Encrypt DM Verity. OrangeFox also.
Does I need Shrp or Orange?
I have a magisk rooted phone.
Can I install twrp without data loss?
Shrp, OrangeFox and TWRP all custom recovery, what you want to use flash from ODIN. You can’t install without loss data.
Hm. What will happen after i flashed twrp with odin?
The phone won’t start?
Using Stock Rom
If you follow all the methods from staring it’s install without problem. I have also same phone bro, watch my video on YouTube I make video also “how to install TWRP”.
Great guide!
I followed this guide and was able to successfully install TWRP Recovery on my Samsung Galaxy A9 2018. The instructions were clear and easy to follow, and the whole process was very quick and painless. I would highly recommend this guide to anyone looking to install TWRP Recovery on their Galaxy A9 2018.
Overall Rating: 5/5
I want a samsung galaxy tab a9 twrp anyone helps me
For your phone, the official TWRP is available just check the official site at twrp.me.